

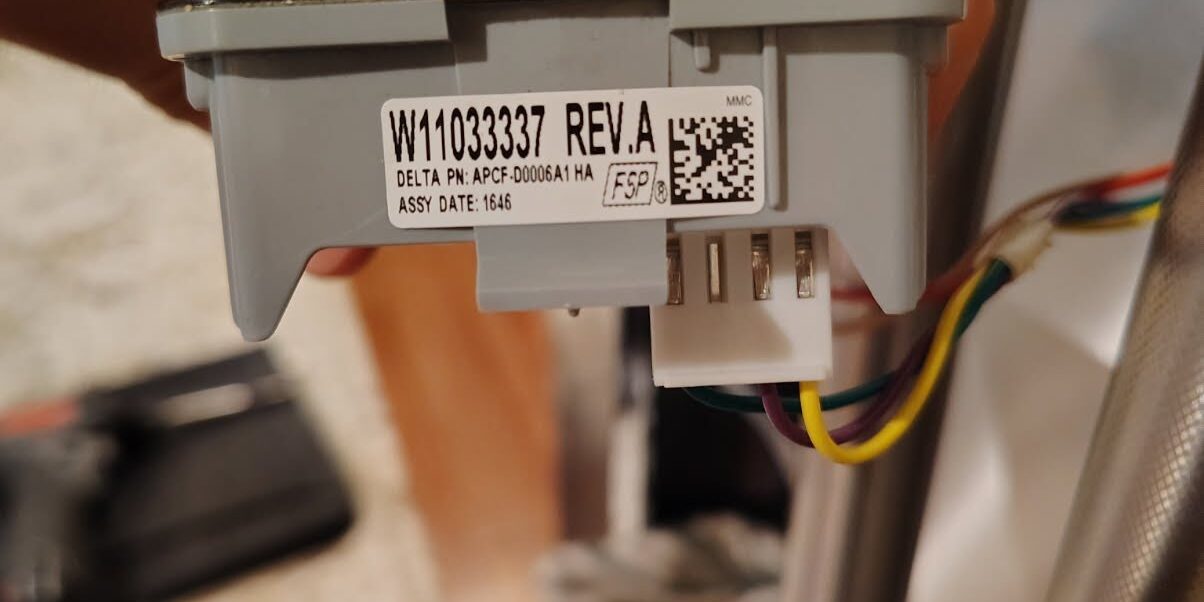
A KitchenAid refrigerator with no lights, a blank display and no cooling may have a power-supply problem or a fault in a low-voltage component. Once incoming power is confirmed, our technicians check the Orion power board and the circuits it supplies. This article explains our company’s KRFC604FSS00 repair records, the checks that helped us restore operation, and parts references for KRFC604FSS00 and KRFC704FPS03.
What you can check before calling for service on your KitchenAid refrigerator
Check the breaker or GFCI and make sure the plug is seated, if you can reach it safely. Test the outlet with a small lamp. If the breaker or GFCI trips again, leave it off and have the circuit checked. Keep the refrigerator panels in place. Before calling, note whether the interior temperature display, exterior dispenser and interior lights work, and whether either compartment is still cold. These details help narrow down the problem.
Our technician’s repair record: KRFC604FSS00 in Atlanta, GA
During a refrigerator repair in Atlanta, GA, our technician confirmed that the outlet had power, but the KitchenAid KRFC604FSS00 was silent: no lights, no display and no cooling.
After an Orion power board was installed, power returned to some circuits and the exterior dispenser responded. However, the interior temperature control, also called the eyebrow user interface (UI), still did not work. Both compartments remained dark, and the compressor briefly started and stopped.
Our technician then installed UI board W11099340. Following the UI replacement and connection checks, the low-voltage short condition was resolved and the refrigerator resumed operation. Our technician’s findings pointed to the original UI as the suspected source of the short.
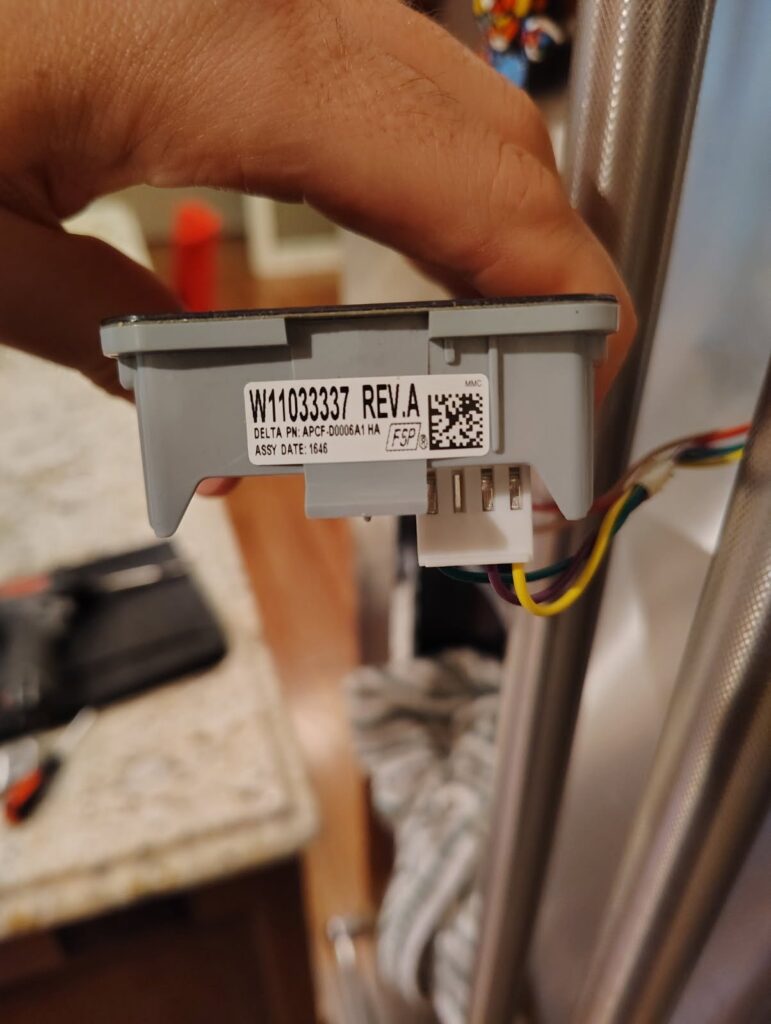
UI BOARD W11099340
What to check on a similar refrigerator: these symptoms do not automatically mean the UI has failed. A short in another DC component or its wiring can also pull down the low-voltage supply. Depending on the affected circuit, possible causes include LED modules, fan motors, the three-way refrigerant valve coil, other controls or a damaged harness. Test the affected branches before choosing a replacement part.
How a technician separates a bad board from a DC short
The Orion takes AC power through the incoming line filter and supplies low-voltage DC to several circuits. A failed Orion can leave all of them dark. So can a component or pinched wire that overloads a shared supply. Live measurements are for a qualified technician. We disconnect power before moving a connector and follow the wiring sheet for the exact model.
- Follow power from the outlet to the Orion. Check the cord, connections and AC voltage on both sides of the EMI line filter. If AC never reaches the Orion, trace the loss upstream.
- Compare DC at the board and at the affected control. With correct AC input and low DC output, we test whether the Orion can maintain voltage when the suspect load is isolated. If the board output is normal but the UI feed is low, inspect the harness, connector pins and return path. If both voltages are normal, check the control and its communication wiring.
- Isolate one branch at a time. Following the service procedure, compare the DC reading before and after isolating each suspect branch. If the voltage recovers, check that branch’s wiring and component separately. If voltage stays low with the specified loads isolated and AC input is correct, the Orion becomes the leading fault. After the repair, reconnect everything and verify both controls, the lights, fan operation and cooling.
DC components and wiring to check
- Door temperature control and dispenser UI. These are separate electronics. A working water dispenser alongside a black temperature display is a reason to measure both feeds. Inspect wiring where the door flexes at the hinge.
- LED modules and pantry wiring. Check the ceiling or liner lights, freezer module and shelf or drawer lighting on the affected branch. Look for damaged wiring where the pantry drawer moves. One dark light with cooling and controls still working calls for a different test than a whole refrigerator that goes dark.
- Fan motors. Check the fresh-food evaporator fan, freezer evaporator fan, ice-box fan and condenser fan. The technician checks the feed under the commanded operating condition and looks for ice, damaged wiring or a motor that pulls the voltage down.
- Three-way refrigerant valve coil. The electrical coil is a DC load. The coil, the sealed refrigerant valve body and the drinking-water inlet valve are three different parts. A suspected electrical short calls for testing the coil and its harness before opening the sealed system.
If these branches pass their checks, continue through the remaining loads and communication circuits shown on the exact model’s wiring diagram.
What our company’s technician records show
In our KRFC604FSS00 case, the dispenser could operate while the interior display and lights remained off. Power returning after the Orion installation was only part of the repair; the UI still required attention before normal operation was restored.
Our technician also recorded voltage changes while isolating DC components. A voltage change helps identify a branch that needs further testing, but does not by itself prove that the disconnected component is defective. Check the component, its harness and the power supply together.
For KRFC704FPS03: use the same diagnostic approach, with the wiring sheet and parts list for that exact model. The completed repair described above was on KRFC604FSS00; it does not establish the same failed part on KRFC704FPS03.
Parts references for KRFC604FSS00 and KRFC704FPS03
The tables below retain the part numbers from the article’s research and repair records. They are lookup references, not a replacement-parts shopping list. Confirm the full model number, serial applicability, installed assembly label and current replacement number before ordering. Similar-looking controls can have different functions or require a matched kit.
| Component | KRFC604FSS00 | KRFC704FPS03 |
|---|---|---|
| Orion power board / compressor control | W11131873 | W11336586 |
| Interior door temperature control (eyebrow UI) | W11099340 Replaces W11045560 from our repair | W11330486 Replaces W11227903 |
| Cabinet main control (GF2) | W11333076 | W11533213 Matched kit for W11450890 |
| Exterior water and ice dispenser UI | W11099702 | W11533213 Dispenser-front position 2, paired with the cabinet board |
| Incoming power-line filter (EMI) | W10792503 | W10792503 |
KitchenAid refrigerator KRFC604FSS00. The original temperature-control assembly in our repair was W11045560, which crosses to W11099340. A separate catalog entry crosses W11033337 to W11039890. Match the label on the installed assembly before choosing between those listings.
KitchenAid refrigerator KRFC704FPS03. Whirlpool calls for kit W11533213 when servicing cabinet control W11450890. The kit pairs the main control with the exterior dispenser UI. The interior temperature-control panel has its own number, W11330486. The 704 model catalog also shows the separate dispenser panel W11099702. When the fitted labels or repair history differ, confirm the correct dispenser configuration with Whirlpool before ordering.
Older Orion labels. For KRFC604FSS00, W10789117, W10887812 and W10918848 cross to W11131873. The KRFC704FPS03 factory diagram lists W11317283, which crosses to W11336586.
| Component | KRFC604FSS00 | KRFC704FPS03 |
|---|---|---|
| Refrigerator evaporator fan and cover | W10889360 | W11395558 Replaces W11327989 |
| Freezer evaporator fan and cover | W11394920 | W11394920 |
| Ice-box fan assembly | W11407678 | W11407678 |
| Condenser fan assembly | W11024494 | W11024494 |
| Three-way refrigerant valve, electrical coil | W11429989 | W11429989 |
| Three-way refrigerant valve, valve body assembly | W11594657 | W11575001 |
| Refrigerator liner LED strip, diagram position 3 | W10887788 | W10887788 |
| Refrigerator liner side lamp, diagram position 23 | W11214258 | W11481987 |
| Single-point LED module service kit | W11683243 Freezer diagram originally lists W10660728 | W11683243 Freezer diagram originally lists W10843353 |
| Shelf / pantry light, shelf diagram position 18 | W11401419 | W11401419 |
| Pantry drawer wire harness with thermistor | W11744510 Replaces W10779301 | W11744510 Replaces W10779301 |
| Condenser fan wiring harness | W10655759 | W10858511 |
Both factory diagrams give W10709318 as the original three-way valve coil. W11429989 is the service coil listed for both models. The single-point LED kit applies to the module style covered in Whirlpool’s lighting bulletin. The liner strips and shelf lights have their own numbers.
Other wiring references include the air-tower jumper W10848895 and dispenser-paddle jumper W10704135 on both models. The 604 cabinet diagram lists jumper W10831131. The 704 shelf diagram lists crisper LED jumper W10835866. Trace the suspect wire to its diagram position before ordering a harness.
Parts diagram and wiring-sheet references
View the KitchenAid KRFC604FSS00 parts diagrams. This link is for KRFC604FSS00; use the exact KRFC704FPS03 catalog when servicing that model.
English tech-sheet references in the article’s records: W10832390 for KRFC604FSS00 and W11190777 for KRFC704FPS03. Use the wiring sheet supplied with the refrigerator to confirm connector locations, test points and expected voltages.
Need KitchenAid refrigerator service in North Atlanta?
Tell us the full model number, whether the inside display and outside dispenser respond, and which compartment is still cold. A photo of the model tag helps us look up the right wiring sheet before the visit. Schedule with Atlanta City Appliance Repair or call (404)903-1453.
